
Managing/Unmanaging Devices
Overview
Do Not Use Smart Groups
Smart groups do not have the "Managed" criteria.
Departments are encouraged to use the "Advanced Search" option that is provided below.
The How-To
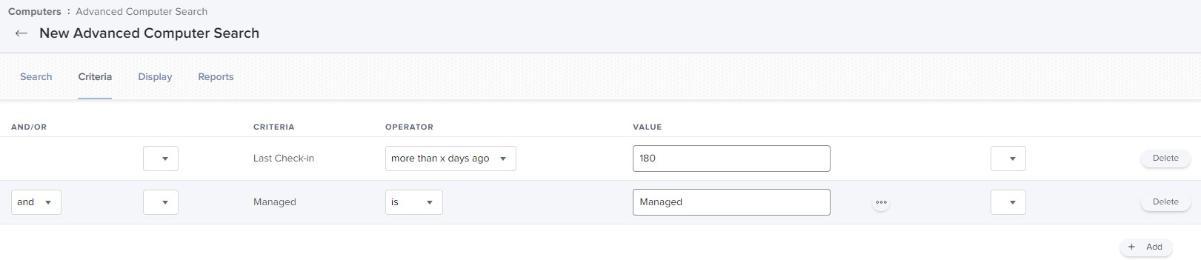
https://docs.jamf.com/10.28.0/jamf-pro/administrator-guide/Advanced_Computer_Searches.html
Departments could use “Search Inventory -> New” to create and see their managed/unmanaged based on the following criteria.
For computers (Mac) the criteria is based on check-in date and managed or unmanaged.
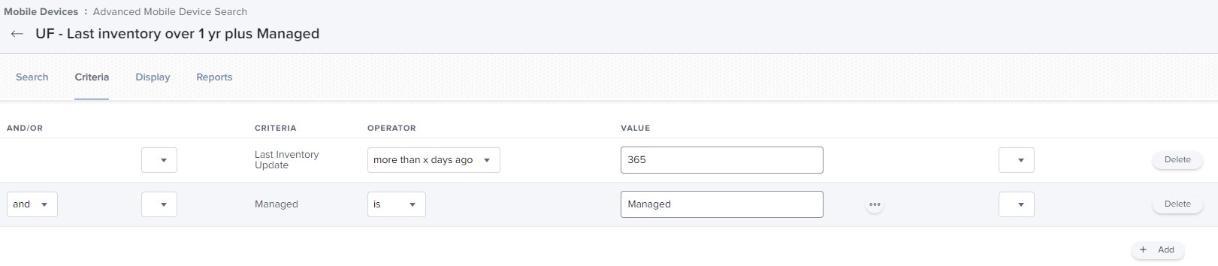
https://docs.jamf.com/10.28.0/jamf-pro/administrator-guide/Advanced_Mobile_Device_Searches.html
For mobile devices the criteria is based on “last inventory update” since there is no “Last Check-in”. Reports could be emailed with the updated information based on how frequent they want them.
Temporarily Unmanaging Computers from Jamf Pro
The following workflow can be used to temporarily unmanage a computer from Jamf Pro. With this method the scope is limited to one computer at a time.
- Log in to Jamf Pro.
- Click Computers at the top of the page.
- Search for the computer you want to unmanage.
- In the General category, click the Edit
- Deselect the Allow Jamf Pro to perform management tasks
Warning: Deselecting this setting will clear the management account credentials. If you are using Jamf Remote and want to resume management of the computer in the future, you must save the management account password.
- Click Save.
Jamf Pro stops performing management actions on the computer. All components installed by Jamf Pro remain on the computer.
Note: You can have Jamf Pro resume management of the computer at any time by reselecting the Allow Jamf Pro to perform management tasks checkbox and entering the management account credentials.
Unmanaging Mobile Devices from Jamf Pro
Unmanaging a Single Mobile Device
- Log in to Jamf Pro.
- Click Devices at the top of the page.
- Perform a simple or advanced mobile device search, and click on the target device.
For more information, see the Simple Mobile Device Searches or Advanced Mobile Device Searches sections of the Jamf Pro Administrator's Guide. - Click the Management
- Click Unmanage Device.
Note: If you also want the device to be erased, use the Wipe Device command instead. As long as the device is not assigned to an MDM server in Apple School Manager or Apple Business Manager, it will not enroll into MDM the next time it goes through the Setup Assistant.
- Click OK.
Jamf Pro confirms the remote command was sent. - (Optional) Click Delete to delete the device's inventory record from Jamf Pro.
For Jamf license compliance check the following URL.
If you have any questions, please create a TDX Ticket.