
Jamf Connect
Jamf Connect, just like Jamf Pro, is a cloud-based service. It does not require being connected to the VPN to use the login feature of the application. If a network is not connected to the computer, Jamf Connect will allow the user to access their computer with the 'local account', this is the account that was created previously to match your network credentials. This is a fall back for the user.
Jamf Connect has been configured and tested for Gatorlink account password synchronization to the local Mac account. Below is some key information to know before starting to use Connect.
- Connect works by having the password hashes of the Gatorlink account passwords synchronized to Entra ID.
- An Entra Enterprise Application, Entra role, and Entra security groups enable Jamf site administration by departmental IT units.
- UFIT will need to know the ADM accounts for each IT unit department to be added to an Entra group for site administrators. Please submit tickets for this to End-Point Computing>End-Point Management>Jamf - Mac Platform Management.
Each department will be provided with a Configuration Profile template. The Configuration Profile template allows the department to either use the basic settings or expand on the settings that Connect can provide, such as not demoting the user to a non-administrative user. The Configuration Profile is “linked” to sites and can be scoped to different groups or computers, like GPOs.
- When users log into a Mac Computer which is in Jamf Connect they will go through the Shibboleth/Duo MFA process.
- Enter the glid@ufl.edu email address at the Microsoft account sign in, then go through Shibboleth and Duo authentication.

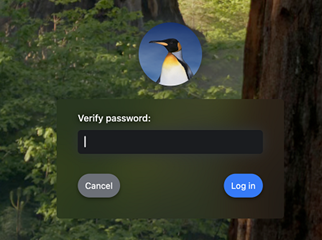
- Logging into the local Mac computer account validates the local account password with the network (Gatorlink) password. Note: Jamf Connect does not automatically sync the network (Gatorlink) password to the local Mac account. If this is the first login after the user has changed their Gatorlink account password, then they will need to enter the previous local Mac Computer account password.
- At the desktop, click the Jamf Connect Menu icon (circled red below) then click Sync Password to force Connect to synchronize the network (Gatorlink) password to the local Mac account.


- Enter the glid@ufl.edu email address at the Microsoft account sign in, then go through Shibboleth and Duo authentication.
Additional Information for Local IT Support
- Jamf Connect Documentation
- Jamf Connect 2.45.1 works with macOS 13.x and newer.
- You can find the Plist files and the Jamf Connect App at:
- \\ad.ufl.edu\ufem\JAMF\Tools\JamfConnect
- The Plists files used for the Configuration Profiles
- JamfConnect-2.45.1.dmg - The Jamf Connect Configuration App
- JamfConnect.pkg - Jamf Connect app
- \\ad.ufl.edu\ufem\JAMF\Tools\JamfConnect
- If the Mac computer will be in Jamf Connect it must not be Active Directory joined. If it is, run the following command:
dsconfigad -remove -u DomainAdminsUserName -p Password
- All users are being setup as regular/non-administrative accounts using the current template.
-
Password Sync Menu item
- The Password sync applies to a user after the password has been changed using UF’s procedure. The network account, GLID, and local account passwords will not be the same after the change. Clicking on the Menu item will sync the passwords on the Mac computer.
- Jamf Connect is not the authority on updating the user’s password.
- Administrators need to login into the device once to create their ADM accounts. This will enable them to do administrative work and/or to perform elevated commands from the regular (local) account.
- The Jamf documentation links below cover how to modify the Configurations for the Menu and Login Plist:
- On Jamf Pro you'll need to locate your Application located under Computers ->Mac Apps->Jamf App Catalog

- Select New on the top right corner
- On the next page, select Jamf App Catalog and select Next.
- The, on the search bar, look for Jamf Connect and click add.