
Getting Started
The Basics
After logging in for the first time, notice UF's DDI web interface provides context-sensitive help documentation in the far right panel. The following describes the subpanels and what information they provide:
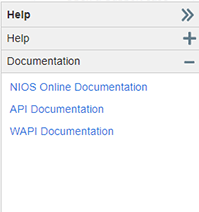 Help subpanel: provides context-sensitive help about the screen you are currently on.
Documentation subpanel: provides links to API (Application Programming Interface) Documentation, and WAPI (Workflow Application Programming Interface) Documentation.
You can get a full Admin Guide by clicking on NIOS Online Documentation link and downloading a .pdf file for the current version of NIOS (Click About in the Help subpanel to check the current version of NIOS).
Note: A list of web browsers that have been tested with the Grid Manager and their known limitations is provided by Infoblox in Chapter 1 of the Admin Guide.
Navigating UF's DDI web interface
UF"s DDI web interface displays a Tasks Dashboard by default upon logging in. This allows you to perform routine tasks such as adding networks, hosts, fixed addresses, CNAME records, TXT records, MX records, and CSV imports. Next to the Dashboards tab is the Data Management tab, which allows you to browse networks in different views.
IPAM View
IPAM view provides a single view that combines both DNS and DHCP data. It allows you to view every IP address in a network and how they are (or aren't) being used.
To browse IPAM view:
- Select the "Data Management" tab.
- Select "IPAM" from the second row of tabs.
- Select the desired network or network container from the list.
Viewing a Subnet in IPAM View
When viewing a subnet in IPAM view you have the option to view it in "Net Map" view or "List" view.
In "List" view:
- To open an individual subnet you can click the checkbox next to it and click the right arrow icon on the top right panel above the workspace, or just click the underlined subnet/CIDR.
- If you open a subnet, the interface will display a list of related objects for the network.
- You can bookmark frequently used subnets by clicking the star icon to the right of the network address at the top panel.
- You can edit a subnet by selecting the checkbox next to it and clicking the pencil/notepad button on the top right panel above the workspace.

DHCP View
To display Networks in DHCP view:
- Select the "Data Management" tab.
- Select the "DHCP" tab.
All available DHCP Networks will be displayed in the workspace.
Viewing a Subnet in DHCP View
- To open an individual subnet in DHCP view you can click the checkbox next to it and click the right arrow icon on the top right panel above the workspace, or just click the underlined subnet/CIDR.
- If you open a subnet, the interface will display a list of DHCP related objects for the network.
- You can bookmark frequently used subnets by clicking the star icon to the right of the network address at the top panel.
- You can edit a subnet by selecting the checkbox next to it and clicking the pencil/notepad button on the top right panel above the workspace.
Subnets viewed in DHCP view will show all DHCP related objects such as fixed addresses, ranges, and DHCP enabled hosts.

DNS Zones
UF's DDI web interface allows you to view DNS zones. Viewing a DNS zone requires you follow a few simple steps. For example, if you wished to view the zone "biology.ufl.edu":
- Select the "Data Management" tab.
- Select the "DNS" tab
- Select the "Zones" tab.
- You have the choice of three different views: External, Internal, and ufinfo. Select "Internal".
- At the top of the workspace you will see a search box. Type in "biology".
- Select "biology.ufl.edu" from the list of results.
- Open the zone by clicking on its underlined name in the workspace.
Viewing a Zone
When viewing a zone the workspace displays the Records within that Zone. In addition to the "Records" and "Subzones" tabs which we have already discussed, note the following controls in the area above the table near the top of the main workspace:
