There are two ways you can add or create sections in QuickReg.

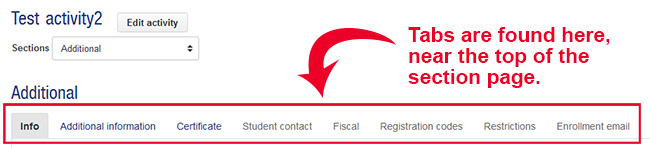
As shown in the above image, you will see the eight tabs as listed below:
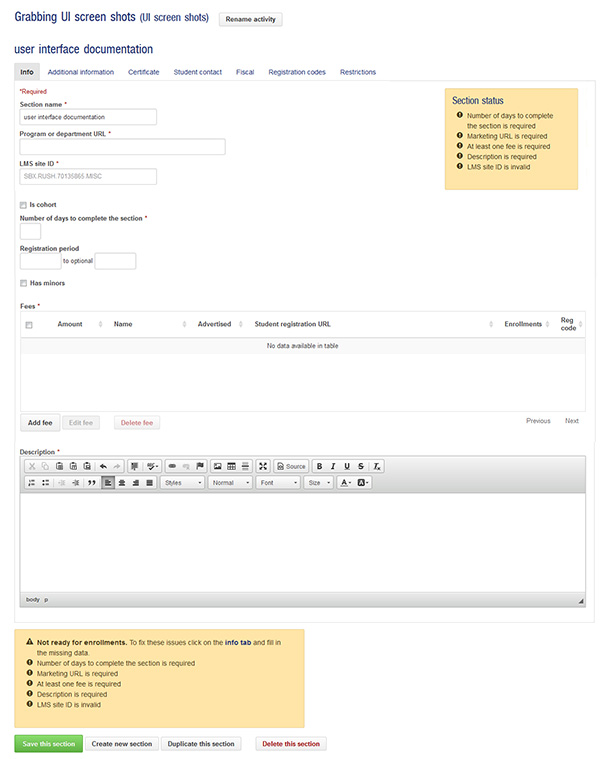
Info — this tab is the main section-creating tab. Here you must enter the section name, create fees (the registration URLs are generated here, with a convenient “Copy URL” button!), enter the LMS site ID number, etc. View detailed description of the Info tab.
Additional information — here you can create question sets to gather additional information that your students answer during the registration process. If you need to collect professional license numbers, or county information, etc. this is where you will go to create those questions. Instructions for creating Additional information sets.
Certificate — QuickReg allows program administrators to create certificates of completion for their students who have met or exceeded the course passing grade requirement. Instructions for creating Certificates.
Student contact — use this tab to change the program's contact information that is displayed on the section's registration page such as email, website URL, etc. Potential students will see this information and will be used by them if they have any questions about your course offering.
Fiscal — for sections that charge a fee, the fiscal tab displays the default refund policy students will see. Use this tab if you wish to change the refund policy for your section.
Registration codes — this feature is no longer available.
Restrictions — the restrictions tab allows you to create restriction sets by selecting different UF affiliation types. This will then allow only those individuals with the correct UF affiliation to register for your section. Instructions for restricting enrollment by UF affiliation types.
Enrollment email — enrollment email allows you to create custom successful enrollment emails that your students will receive once they enroll into your course. Instructions for creating a custom successful enrollment email.