Physical Security - Video
Install Genetec Security Desk
This document will explain how to install the Genetec Security Desk Client.
Prerequisites
Before you attempt to install the security desk software, please make sure that you install the following prerequisites.
Installation
Below you will find the various methods you can use to install the security desk software.
One-Click Install
For the Once click install process, the computer must be joined to the University of Florida domain and running on UF networks. For offline\non-domain installs please use the Offline Installer.
- Download the Genetec Security Desk installer.
- Once the file “Genetec Security Desk 5.9.4.exe” is downloaded, right-click the installer and choose Run as Administrator.
- The Auto-Installer windows will open and begin to install the Genetec Security Desk application without any further user interaction. The process will take around 5 minutes to complete.
- Once the Auto Installer window closes the application install has completed. You will find the shortcuts for your application in your start menu under the Genetec folder.
Off-line Install
The off-line installer is for installing on computers that aren’t joined to the University of Florida domain.
- Download the Genetec Security Center application.
- Unzip the package that you just downloaded.
- Right-click setup.exe and click Run as administrator.
- On the Setup Language page, select the language of the InstallShield Wizard, and click Next.
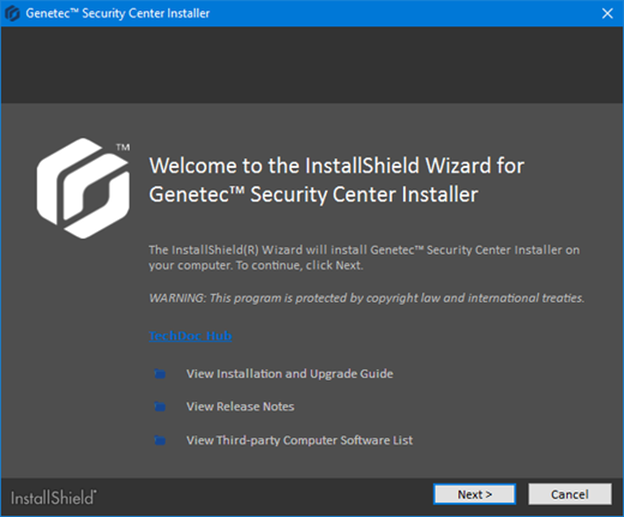
- On the welcome page, click Next.
- On the License Agreement page, read the terms in the Software License Agreement, select I accept the terms in the license agreement, and then click Next.
- On the Custom Setup page, select the Security Center features Security Desk and then click Next.

- On the Genetec Security Center Language Selection page, select the user interface language for Security Center applications, and click Next.
- On the Firewall Rules page, grant the installer permission to automatically configure the Windows Firewall for Security Center, and click Next.

- On the WinPcap Installation page, un-select Install WinPcap, and click Next.
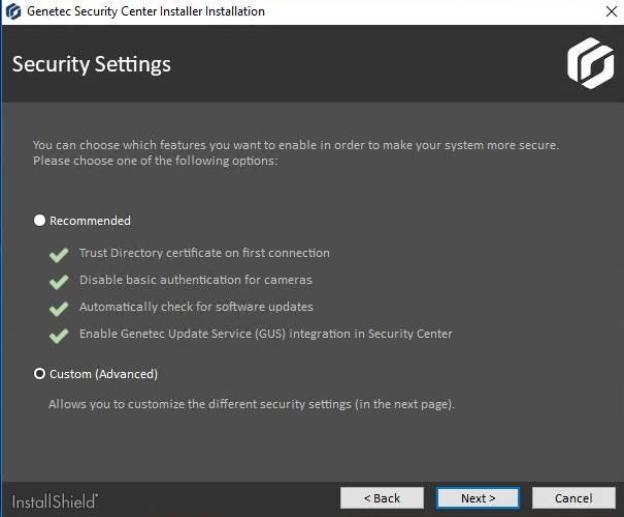
- On the Security Settings page, Select Custom (Advanced) then click next.
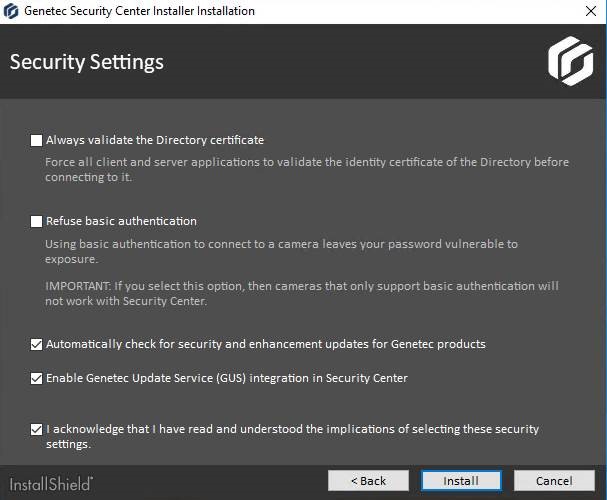
- Uncheck “Refuse Basic Authentication” and check “I Acknowledge that I have read..”then click install.
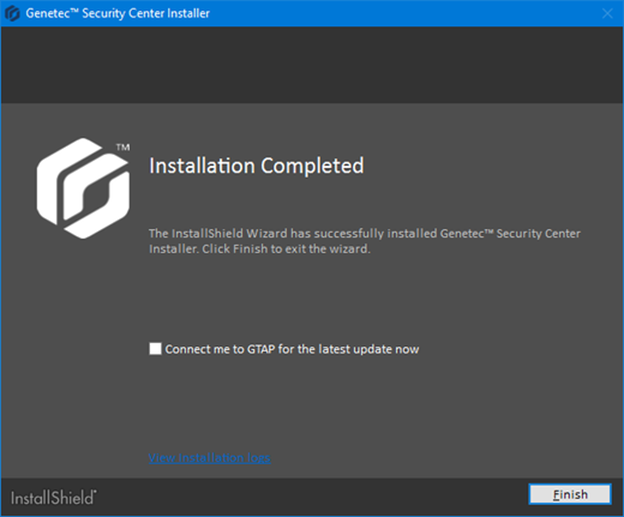
- On Installation Completed page, select the required post-installation options, and click Finish.