This web page details the updates made within XMS in preparation for CE Broker data management. These updates will allow XMS users the ability to generate a standard CE Broker import spreadsheet from within the XMS application.
XMS users will notice several new features such as a new section labeled CE Broker, a new tab on the left side of the Section page labeled CE Credit, etc. All of these new features are explained below.
Student Record Page
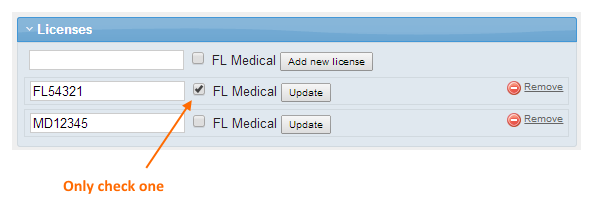
The Licenses section on the Student page in XMS has been updated to include a checkbox which will indicate which license is the student’s current Florida Medical License. Even though multiple boxes can be checked, only one box should be checked. If more than one checkbox is selected, data problems could occur. See the image below.
Section Page Details
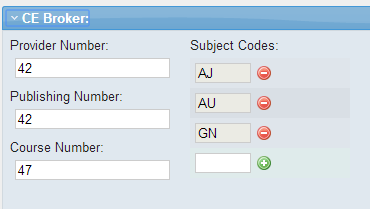
A new section has been added to the Section page in XMS. The new section is called CE Broker. In this area, you will define the basic CE Broker data for this section, including a list of the subject codes that will apply to any registrant in this section. See the image below.
CE Credit Tab Located on the Section Page
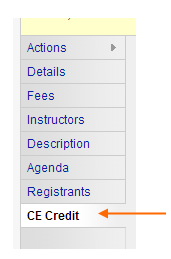
A new tab has been added to the left side of the Section page. This is where you will set the specifics of the registrant data as it should appear on the export spreadsheet.
The CE Credit page will list each registrant in the section and allow you to modify, save, and export the results.
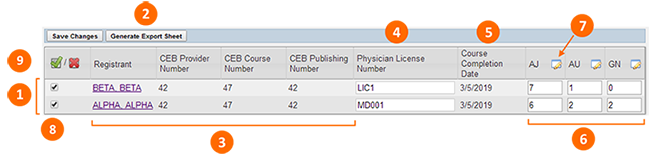
- List: All registrants in this section will be listed here
- Generate Export Sheet: Click this button to create an Excel Spreadsheet that conforms to the CE Broker import layout. Only checked registrants will be included on the report.
- Standard Data: The CEB fields are always the same for each registrant and taken from the information provided on the Section details tab.
- Physician License Number: The registrant’s FL Medical License number, taken from the student record’s licenses list (if more than one FLMD license is found, the first one returned from the database will be used here. Be sure there is only one marked as a FLMD License).
Note that editing this value will have one of two effects:
- If this value is not in the student’s list, it will be added and flagged as the student’s only FLMD license.
- If this value is already in the student’s list, it will be flagged as the student’s only FLMD license.
- Course Completion Date: Taken from the Section’s End Date.
- Subject Codes: Each subject code associated with this section from the details page will be shown here. You can fill the hours in as needed. There are no validations for sums as the business needs may include a summation of hours here that do not equal the total hours associated with the section.
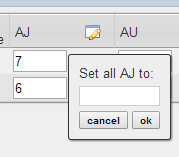
- Auto Fill: Click this “pencil” icon to select a value to apply to all registrants for this subject code.
- Checkboxes: Only records that are checked will be placed on the import sheet. Note that the initial values of these checkboxes will only be checked if there is a FLMD license for this student.
- Check/Uncheck All: Click these images to check or uncheck all registrants
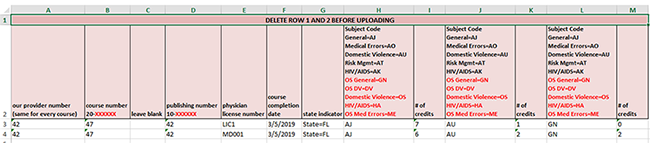
Sample Export Sheet
The image below shows what a sample export sheet will look like.