The Enrollment Email tab as shown in the image below allows QuickReg administrators to create custom emails that are sent to students when they have been successfully enrolled into a course.

When you click on the tab, you will see the default successful enrollment email as shown below.
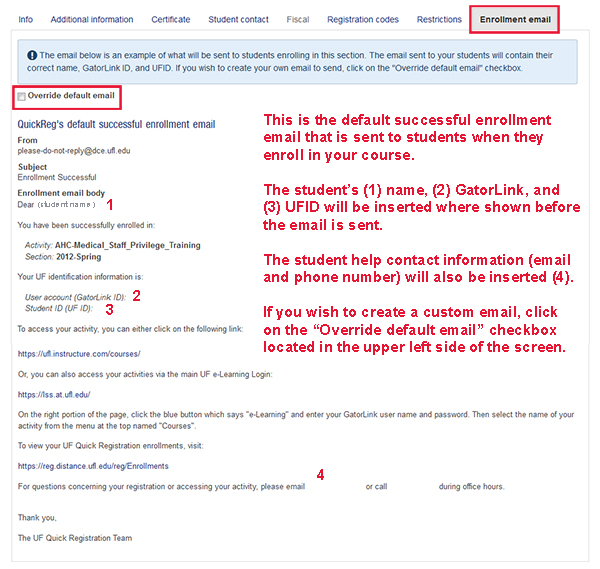
Be aware that the information shown is only an example that uses the admin's information for placement purposes, the student's correct name, GatorLink, and UFID will actually be used in the email that is sent to the student.
If you wish to create a custom email, select the "Override default email" checkbox, you will see this screen.
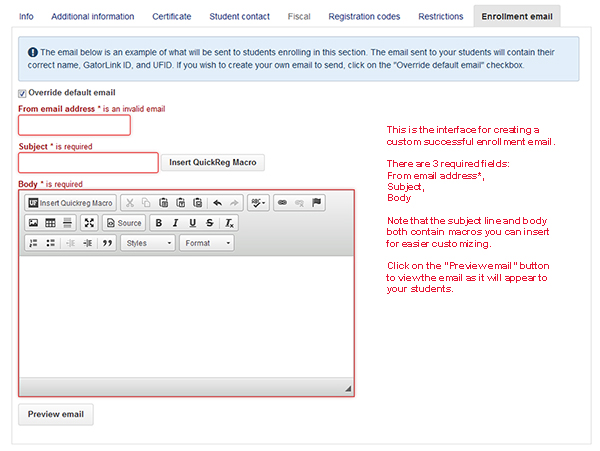
The custom email has three fields as explained below:
Inserting Macros
The subject line and the body both offer macros for users to insert within the custom email. There are several to select from including, student first name, last name, GatorLink, UFID, etc.
To insert a macro, place your cursor where you wish to add the macro, then click on the "Insert QuickReg Macro" button located at the upper left corner of the body editing menu or near the subject line. You will see a dialog box as shown below:
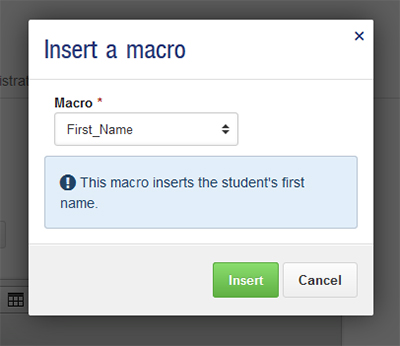
Select the macro you wish to insert from the drop down list and then click on the "Insert" button. The macro should now be inserted into the email. You can add as many macros as you wish albeit one at a time.
Once you have finished adding macros you can click on the "Preview email" button to see the results.
If you need assistance or have any questions about QuickReg, please submit a help request here QuickReg help request.