Designating who receives the Student Enrollment Emails
Program administrators can determine who receives student enrollment notifications by following the steps outlined in the “Getting Started” section below.
Things to Know
- The person who will be receiving the notifications does not need to be a QuickReg administrator.
- You will need to know the UF email address of any person you wish to add to receive the notifications.
- Only UF emails will be allowed to receive the notifications.
- UF emails that are distribution lists or mailing lists can be used to receive the notifications.
- Multiple persons can be listed to receive notifications from the same program, activity, or section.
Getting Started
Log into the QuickReg application here: http://reg.distance.ufl.edu/ and hover the cursor over the Administration tab in the blue menu bar. You should see "Notifications”. Click once on the “Notifications” link and you will see the screen as shown below.
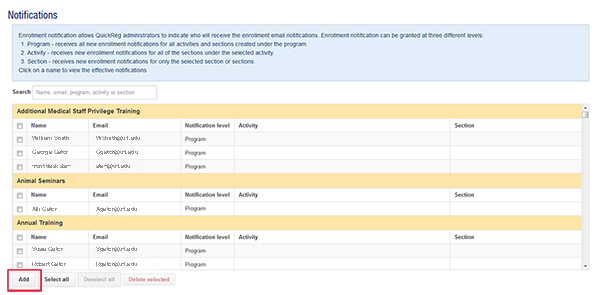
To add an individual or group email to receive notifications, click on the "Add" button as shown in the image above, you will see this screen:
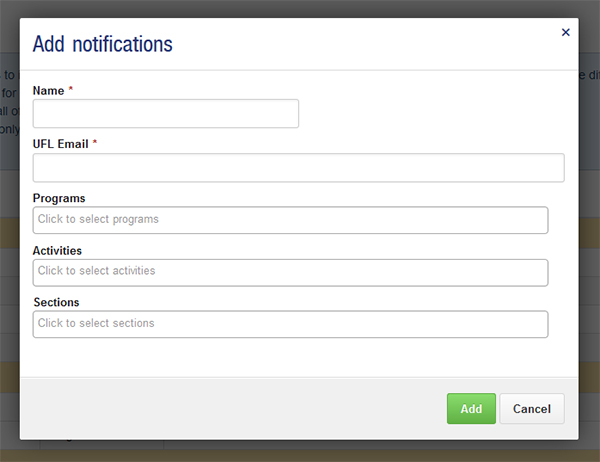
- Name* — (required) Enter the name of the person (ex. John Smith) or group (ex. front desk staff) who will be receiving the notification.
- UFL Email* — (required) Enter the email that will be receiving the enrollment notifications, the email can be for a person or a distribution email, it must be a UF email account.
- Programs — select from the Program level, if you want the email to receive all enrollment notifications for any activity/sections that are created under that Program.
- Activities — select from the Activities level, if you want the email to receive all notifications from sections created under that Activity.
- Sections — select from the Sections level, if you want the email to receive all notifications from the section or sections that you have selected.
You can make multiple selections for each email you want to add.
Once you are done making your selections click on the green "Add" button. The emails should be added to the Notifications grid with the appropriate levels (program, activities, section) listed in the "Notification level" column.
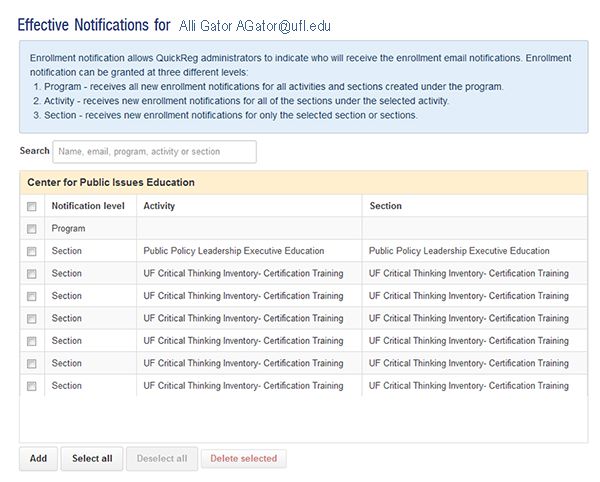
To review the effective notifications for an email, click on the person's or group's name. You will see the "Effective Notifications" screen, an example is shown below.
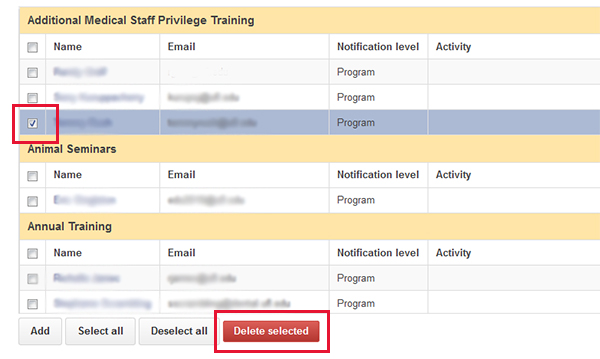
If you wish to remove someone or a group from receiving the notifications, click on the checkbox next to their name and then click the "Delete selected" button, as shown below: