
Microsoft Windows (BitLocker)
Encrypting Microsoft Windows
UF recommends using BitLocker encryption on all current versions of Windows that support it. Home Editions of Windows do not support BitLocker, and are not recommended for use at UF. Faculty, staff and students can obtain low or no cost upgrades to Windows through UF’s agreements with Microsoft.
UF owned computers (including those bought with grant or contract funds) must run the UFEM agent, which provides capabilities to manage BitLocker in order to comply with the university Mobile Computing and Storage Devices standard.
BitLocker Encryption
The following directions are for installing BitLocker encryption on Windows 10. UF owned computers (including those bought with grant or contract funds) must run the UFEM agent, which provides capabilities to manage BitLocker in order to comply with the university Mobile Computing and Storage Devices standard.
BitLocker Installation
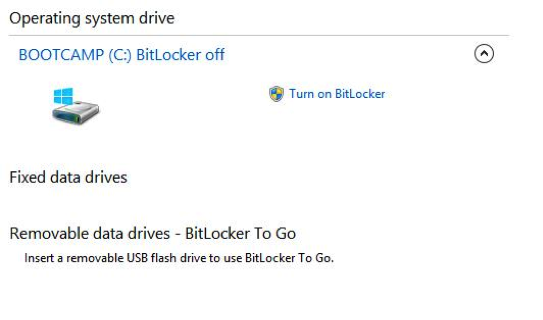
- Begin by opening the Control Panel and selecting BitLocker Drive Encryption.
- When the new window opens, click on Turn on BitLocker.
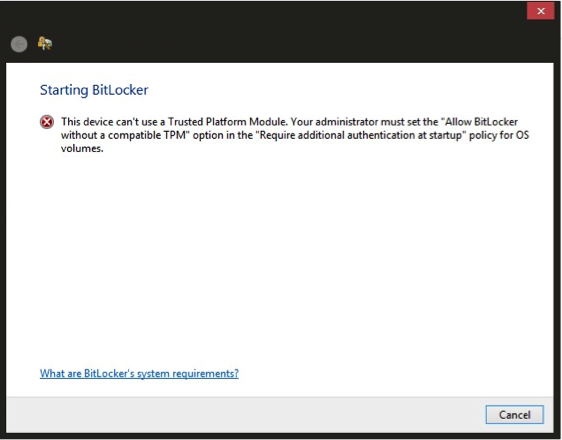
- If you receive a Trusted Platform Module error as pictured below, follow the steps in the section ‘Enabling Additional Authentication Method (no TPM)’ below. If no error, proceed with the next step.
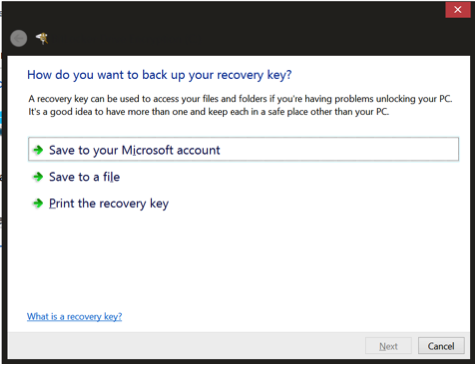
- A new window will pop-up with a green status bar. Once that completes, it will ask how you want to save your recovery key. This recovery key is vitally important, if you forget your password and do not have access to this key, there is no way to access your hard drive or any files stored on it. If you have a Microsoft Account, saving it there is suggested. If you save it to a file, make sure to copy it to a location that is secure, but not on the BitLocker-protected disk. Printing a copy and placing it in a secure location, such as a safety deposit box, is also recommended.
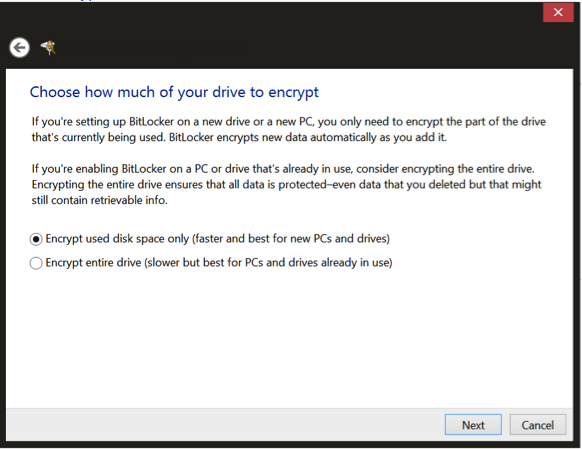
- The next window asks to choose how much of your drive to encrypt. Select Encrypt Entire Drive, then hit Next. Selecting any other option will not be compliant with UF policy.
- The next window asks “Are you ready to encrypt this drive?”. Select Run BitLocker system check and click Continue. Your computer needs to restart now, click Restart Now.
- After the computer restarts, it will automatically start encrypting the drive. This can take a few hours up to 12 or more, depending on the size of the hard drive and speed of the computer. You can check the encryption status with the System Tray icon.
- While waiting for the encryption, make sure to fill out the Encryption Form for Unsupported Devices.
Enabling Additional Authentication Method (no TPM)
If attempting to enable BitLocker results in an error that the drive cannot use a Trusted Platform Module, follow these steps to enable additional authentication, and then start over with the BitLocker installation.
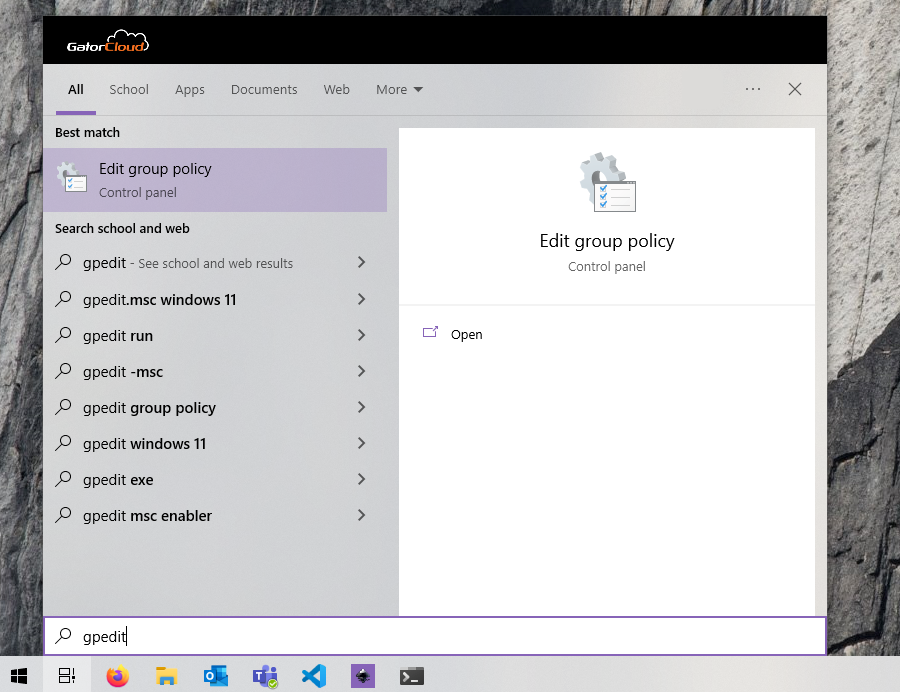
- To override this error, first open Windows Search by selecting the magnifying glass in the taskbar at the bottom of the screen. Alternatively, you can open the Start menu and begin typing to engage Windows Search.
- Enter “gpedit” into the search bar. In the left pane, click on the application Edit Group Policy.
- In the left pane of the gpedit window, click on the arrow to expand the Administrative Templates folder, then the arrow to expand the Windows Components folder, then the arrow to expand the BitLocker Drive Encryption folder and select the Operating System Drives folder.
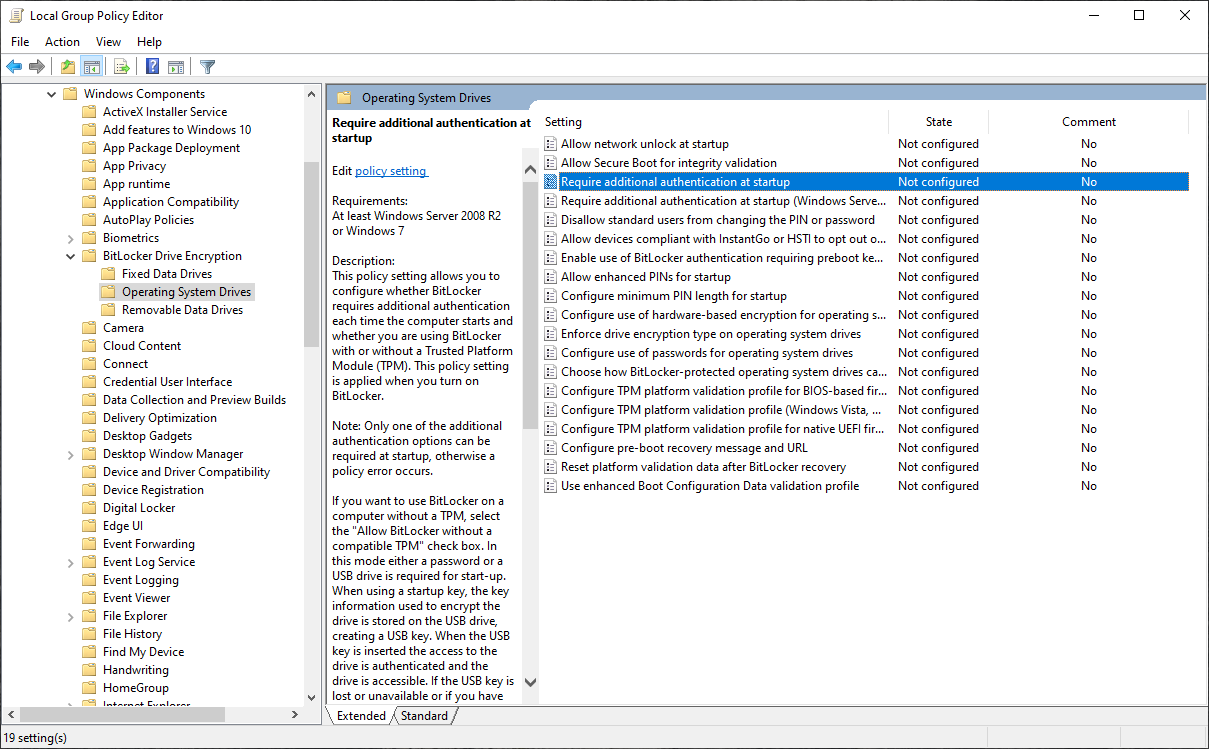
- In the right pane, double click the Require Additional Authentication at Startup item.
- When the settings window opens, select Enabled and then click OK.

- Close the gpedit window and return to the BitLocker Installation section at the top of this page and start over with the BitLocker Installation.