
Single Sign On
UF Single Sign On (SSO)
University of Florida leverages Shibboleth as the Identity Provider (IdP) for single sign on (SSO). UF's implementation supports SAML2 and OpenID Connect (OIDC) protocols.
There are 2 main components for UF SSO:
- Identity Provider (IdP): This component is responsible for authenticating users and providing identity information to a Service Provider (SP). This is managed by the UFIT Identity & Access Management (IAM) team.
- Service Provider (SP): This component is responsible for triggering the authentication and sits at the resource (i.e. website, application). This is managed by the resource's administrator such as an application administrator, webmaster, etc.
UF SSO Simplified Operational Diagram
The figure below shows basic Shibboleth data flow beginning with a user requesting service from a Service Provider (SP) such as a UF website. Using Shibboleth, the Service Provider (SP) does not request the user name and password. This is done by the Identity Provider (IdP) login.ufl.edu.
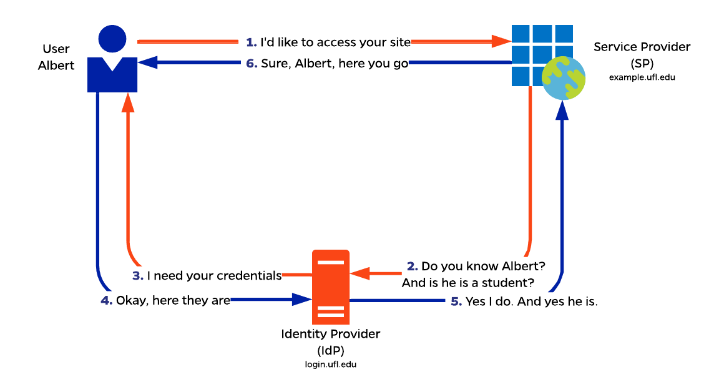
One of the advantages of implementing SSO is the SP does not hold or manage passwords. Additionally, central policies to mitigate risks associated with GatorLinks are applied every time they are used to ensure a safe and secure authentication process including multi-factor authentication (MFA).
Each application/website is considered a Service Provider (SP) which is owned and managed by the application/website administrator. The UFIT IAM team does not manage services providers nor is it responsible for updating their respective metadata and associated certificates.
SP Request Process
All SPs are expected to follow the UF SP policies given on the policies page: https://it.ufl.edu/iam/authentication-systems/single-sign-on/#sso-sp-policies.
The steps for requesting a new SP are:
- All new SPs (except for WordPress sites) are required to have an up-to-date risk assessment of your application. Please go to the Risk Assessment page to begin. The Risk Assessment number will needed before an SP can be requested, and the SP will not be approved before the assessment is complete. The Risk Assessment can be found at this link : Risk Assessment.
- The SP can be requested on the SP Registry site. Note that requestor must be one of the technical or security contacts for the SP.
- Log into the SP Registry
- Click “Request New SP Group”
- The information required for an SP request is documented in the SP registry.
- If you are unsure of what any of the fields mean, hold the mouse over the label (the left column of the online form) and a description of the data will appear.
- The requestor should ensure departmental awareness of the request.
- The requestor, as well as the other contacts, should be aware that they will be required to recertify the SP (i.e. verify all contact information) on an annual basis.
- The IAM Team will review the request and work with the requesting department and campus-at-large and will make any needed changes or adjustments to the request.
- The request is accepted or denied.
- The request is implemented as approved. Technical staff will communicate and establish the new service.
Note: Most areas need to consider how testing will be done and if they need a test service included. This is a preferred and recommended practice. In some large enterprise areas multiple test and development areas might need to be established for the service provider (SP) to deploy applications. The SP should be requested/configured with multiple entityID identifiers for application testing environment as needed.
If you want a visual of all the steps required, you can download the UF Service Provider Request Workflow Diagram.
SP Policies
By using the UF Shibboleth Identity Provider (IdP) for single-sign on services, you agree to the following policies:
- Per UF policy, all Service Providers (SPs) must be configured to use SSO using an approved method. Any exceptions (SPs using local accounts or some other authentication method) require approval by IAM management and the Security Office.
- Every SP must have accurate contact information for a minimum of two unique contacts. Contact information must be verified on an annual basis.
- SPs are required to use current best practices for protecting the data that they receive. This means using signing certificates (encryption certificates are desirable, but not currently required) when interacting with the IdP. Any exception (i.e when an SP does not use at least a signing certificate) must be approved by IAM management. Only directory information will be provided to these SPs. Exceptions will be temporary, and the duration will be determined by IAM management.
- SPs are expected to abide by principle of minimum access. The minimum required attributes should be used in order to perform the necessary function of the SP. SPs that have been assigned additional attributes should take the necessary steps so that the unnecessary attributes can be removed.
- The UF IdP provides data that meets various SSO related standards. Specialized data that is unique to an SP is not supported. Any exceptions to this must be approved by IAM management.
- SPs must maintain the needed certificates and metadata, including any updates needed due to expiring certificates. Expired certificates should not be used.
- All SPs must undergo a risk assessment in order to establish that the application that they are running is safe and the data is protected. An exception is granted for SPs that make use of an official “Fast Path” solution (an application which has had a risk assessment successfully completed and is deemed safe for all SPs). These do not require a risk assessment.
- All SPs must be active. Inactive SPs represent security risks for no benefit. Once an SP has been inactive for 6 months, it will be deactivated. It can be reactivated upon request as needed.
- SPs must be registered in the SP registry in order to use the UF IdP. For convenience, SPs are registered in groups. Each group represents SPs that run the same application (such as a situation where there are dev, test, qat, prod, etc. tiers) and are identical with respect to the information they need from the IdP.
SSO on vendor provided SPs
When working with a vendor to set up SSO for an SP that they provide, the following notes should be helpful.
- Per UFIT standards, all Vendor SPs must use Gatorlink SSO for authentication. SAML2 (an industry standard) is our preferred method for SSO. Ensure that the vendor supports SAML2 SSO authentication. If the vendor does not support SAML2, we have the fallback option to support OIDC (another industry standard).
- Always get a document from the vendor describing their process for setting up either SAML2, or if necessary, OIDC SSO authentication.
- Engage IAM (either using a TDX ticket or by email). IAM will need to be involved in all vendor SAML2/OIDC integrations. When engaging IAM, include the documentation obtained from the vendor. We will not be able to assist until we have that documentation.
Information we will require from the vendor (which should be included in the documentation they provide) are:
- The entityID of the SP
- A list of attributes/claims that the SP will need from the IdP.
- Vendor contact information (that will be included in the SP registry form.
Additional notes:
- If possible, complete the SP registry request before engaging IAM. If that is not possible, due to not understanding the requirements of the SP, or not all information available, go ahead and engage IAM rather than delaying things.
- For SAML2 implementations, all SPs are required to support signed SAML2 transactions. Some vendors do not support the use of signing certificates, and these will require approval from UFIT management (and possibly the security office) to permit them to use our SSO. Exceptions are temporary, and not all data will be made available to SPs that do not support signing.
- For SAML2 implementations, Vendors should have the ability to provide SAML2 SP metadata. This is typically the case, but in some instances, they do not provide metadata. Creating metadata manually is tricky and time consuming and will need IAM approval.
- It would be convenient if they could easily switch between IdPs (so we could use the beta.login.ufl.edu IdP for debugging, but then switch to the production login.ufl.edu IdP). This is not a requirement, but it can make the onboarding process faster. Without this, debugging any issues will be much slower since any change to the configuration will not go into affect until the following business day.
- For SAML2 implementations, if the vendor has specific needs for the NameID, we need to know what they are. This should be in the SAML2 documentation, but is sometimes omitted.
The steps for modifying/removing an existing SP
- A request to modify or remove an existing SP must come from one of the contacts for the SP. To verify the description of the SP, log in to the SP Registry and review the current SP.
- Select “Search SP Database”
- Type the SP Group Number, Group name, or any of the other search criterion and click “Display SP Groups”
- Click on the SP Group that you are trying to investigate
- Changes to an existing must be made by creating a ticket. Submit the UF Service Provider Request by ticket to the IAM Team. Tickets should be created by the ISM or the Technical Contact for the SP being requested.
- If there are significant changes to an existing SP, it may require a new or updated risk assessment. The Identity Services Team will request this if it is needed.
- The ticket will be handled by the IAM team.
Recertifying an SP group
Each SP group needs to be recertified on a yearly basis. Recertification consists of confirming that all of the contact information is accurate so that we can contact the appropriate people in the case of a security or technical incident, or of changes that could impact the SP. SPs are recertified by anyone listed as a contact for that SP. When recertification is due, an email will be sent to the contacts so they can recertify it. SPs that do not recertify in a timely fashion may be disabled and will not be re-enabled until the certification is complete. To certify an SP group for which you are the contact:
- Log in to the SP Registry
- Click on the ‘Recertify SP Groups’ button.
- In each SP that you wish to recertify (which should include any that are listed as ‘Recertification overdue’ or as ‘Certification expiring’), verify that all contact information is accurate. The rules for what contacts are required is included on this page. Update or verify the information and then click on the checkbox in the ‘Recertify’ column.
- Click on the ‘Submit Recertification’ button to submit the results.
It is not necessary to wait until an SP group is overdue or expiring. Any time the contacts change (perhaps due to someone leaving the organization or someone being hired), the SP group can be recertified with the new contact information which will reset the annual clock.
Other SP Tasks
- Uploading metadata. When a new SP is created, you will need to send us a copy of it’s metadata (unless it is in InCommon or it is an OIDC implementation). After you have obtained a copy of the metadata, upload it at the UF Shibboleth Metadata Upload site.
- SAML Information
- When configuring an SP with a vendor using SAML2, you will need the metadata from the IdP which has all the information needed by a vendor.
- Production IdP metadata
- Beta IdP metadata
- When configuring an SP with a vendor using SAML2, you will need the metadata from the IdP which has all the information needed by a vendor.
- OIDC Information
- When configuring an SP with a vendor using OIDC, you will need the openid-configuration from the IdP:
- Production IdP OIDC configuration
- Beta IdP OIDC configuration
- When configuring an SP with a vendor using OIDC, you will need the openid-configuration from the IdP:
If the vendor encounters any issues and you need technical assistance from the IAM team, please open a ticket.
Shibboleth and Windows Server
This page describes the steps necessary to install the Shibboleth SP component on a Windows Server. The steps have been tested on a Windows Server 2022 Datacenter edition.
Requirements
- Shibboleth SP installation file
- Windows Server
- Certificate bound to 443/tcp for HTTPS communication
- Download the Shibboleth SP for Windows (https://shibboleth.net/downloads/service-provider/latest/win64/).
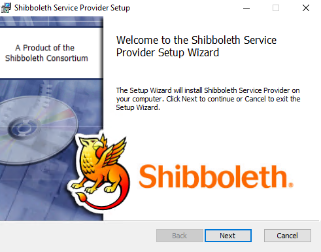
- Run the installation file as administrator
- Click on Next
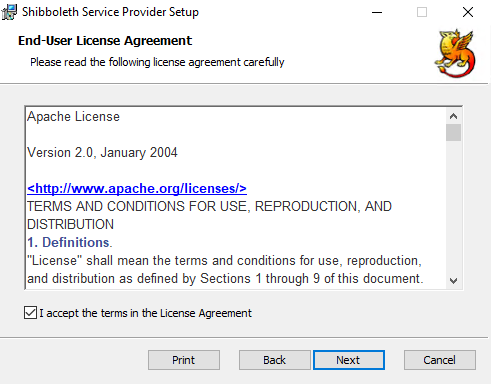
- Accept the terms in the license agreement and click Next
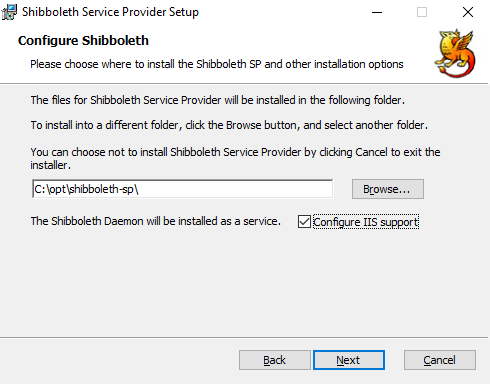
- Keep the default URL and check the Configure IIS support checkbox. Click Next
- Click Install
- Once the installation is finished, click on Finish
- Restart your server by clicking on Yes

- Once your server is back online, open a browser and browse to https://localhost/Shibboleth.sso/Metadata
- You should be able to download metadata. Another URL you can browse to is https://localhost/Shibboleth.sso/Session. It should return the following message: A valid session was not found
Apache .htaccess
Please note that authorization may fail in these examples should you restrict access based on attributes your service provider is not receiving. Also, if you choose to use regular expressions, please pay close attention to substring matches and multivalued attributes. You may use regex lines like require UFAD_Groups ~ "(^|;)Group1($|;)" to ensure you only match an explicit value in a multivalued attribute.
AuthType shibboleth
ShibRequireSession on
require valid-userAuthType shibboleth
ShibRequireSession on
require mail alberta@ufl.eduusername AuthType shibboleth
ShibRequireSession on
require glid albertaAuthType shibboleth
ShibRequireSession on
require UFAD_Groups Group1
require UFAD_Groups Group2AuthType shibboleth
ShibRequireSession on
require UFAD_Groups Group1 Group2AuthType shibboleth
ShibRequireSession on
require primary-affiliation ~ STAFF|FACULTYAuthType shibboleth
ShibRequireSession Off
require shibbolethInstructions for Installing the Shibboleth Module on Redhat Linux
Prerequisites
- Redhat 4 or 5
- Apache Installed
- Download the RPMs for RedHat, do the following. You may need to change the RedHat version and architecture.
curl -O http://ftp5.gwdg.de/pub/opensuse/repositories/security:/shibboleth/RHEL_4/i386/log4shib-1.0.3-2.1.i386.rpm \ -O http://ftp5.gwdg.de/pub/opensuse/repositories/security:/shibboleth/RHEL_4/i386/opensaml-2.3-1.6.i386.rpm \ -O http://ftp5.gwdg.de/pub/opensuse/repositories/security:/shibboleth/RHEL_4/i386/shibboleth-2.3.1-1.2.i386.rpm \ -O http://ftp5.gwdg.de/pub/opensuse/repositories/security:/shibboleth/RHEL_4/i386/xerces-c-3.0.1-6.1.i386.rpm \ -O http://ftp5.gwdg.de/pub/opensuse/repositories/security:/shibboleth/RHEL_4/i386/xml-security-c-1.5.1-4.1.i386.rpm \ -O http://ftp5.gwdg.de/pub/opensuse/repositories/security:/shibboleth/RHEL_4/i386/xmltooling-1.3.1-1.2.i386.rpm - Install the RPMs with the following command:
rpm -ivh log4shib-1.0-1.i386.rpm \ xerces-c-2.8.0-1.i386.rpm \ xml-security-c-1.4.0-1.i386.rpm \ xmltooling-1.0-6.i386.rpm \ opensaml-2.0-6.i386.rpm \ shibboleth-2.0-6.i386.rpm - Edit your httpd.conf to Include mod_shib support:
Include /etc/httpd/conf.d/shib.conf - Edit your httpd.conf for apache turning on UseCanonicalName. If this is not done weird errors will occur.
- Restart Apache
- Start up shibd:
/sbin/service shibd start
Protecting Content
Access control in Shibboleth on Apache is done by either modifying the shibboleth2.xml file in /etc/shibboleth or in the main httpd.conf file or in an .htaccess file. Find more information about protecting content in Shibboleth's documentation.
Access control rules allow you to use boolean logic to specify if a web resource is accessible based on what attributes are available. One of the attributes in our environment that is used in access control is “primary-affiliation”. It specifies if the user accessing the resource is either a “Staff”, “Student”, or “Guest”. For example, a rule to allow only “Staff” to access a resource the rule would look like this:
<AccessControl> <Rule require="primary-affiliation"<STAFF>/Rule<</AccessControl>To protect content if the user is either a “Staff” or “Student” you would use this rule:
<AccessControl>
<OR>
<Rule require="primary-affiliation">STAFF</Rule>
<Rule require="primary-affiliation">STUDENT</Rule>
</OR>
</AccessControl>- Open up the shibboleth2.xml file located in
- Look for a <RequestMapper>element in the shibboleth2.xml file. There should be a child element named <Host>that has an attribute named “name” that is your website’s name
- There should be a child element of <Host> named <Path> that has an attribute named “name” which corresponds with a url in your website that you want protected. By default, that name is “secure”. Change the name to be a part of your webspace that you want to protect eg if you want to protect http://hostname.ufl.edu/payroll then the name attribute would be “payroll”
- Create a child element of <Path> named <AccessControl> which follows the syntax in the above section.
- Restart the shibboleth daemon
Using Apache’s native access controls is really simple and intuitive to do with Shibboleth. If you wish to make content available to any valid user the following could be placed in either an .htaccess file or your webserver config:
AuthType shibboleth ShibRequireSession On require valid-userIf you wanted to only allow authenticated users that are staff members, do the following:
require primary-affiliation STAFFIf you want to give access to either staff or faculty, the following can be used:
require primary-affiliation ~ STAFF|FACULTY