
Infoblox FAQ
- To request Infoblox access, please open a ticket with Infrastructure Reliability Services team.
- You can login to UF's Infoblox Grid Manager web interface by going to: https://ipam.name.ufl.edu/ui/ and using your Gatorlink username and password.
- After 4 hours of idle time, your session will time out and you will need to log in again.
Bookmarks are a quick way to access an object that you use readily.
-
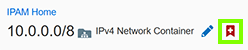
To bookmark an object, navigate to its page and click the Bookmark icon.
- This will add a bookmark to the "Bookmarks" tab in the Finder panel
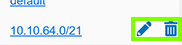
- You can edit or delete a bookmark at any time by clicking the appropriate icon while hovering over the bookmark in the "Bookmarks" Finder tab.
- You can create only one bookmark for each object, up to 500 objects.
The recycle bin allows you to easily recover an object that you have mistakenly deleted. Although rarely encountered, not all deletions can be recovered. Infoblox will notify you if you run into this case.
- Expand the "Recycle Bin" tab in the Finder by clicking the "+".
- Please note, that you will not see a confirmation dialog before restoring an object from the Recycle Bin.
- Place the cursor over the bookmark in your list and click the "Restore" icon.
- You may delete the restore definition by clicking the delete icon. This will remove the restore definition permanently.
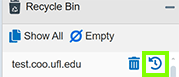
- The "Recycle Bin" tab can only display a limited amount of objects to restore. By clicking the "Show All" a separate dialog box of all your restorable objects will be displayed allowing you to restore or delete.
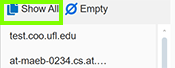
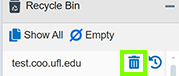
- You can use the "Empty" button or the trashcan button while in the "Show All" dialog to remove everything from your recycle bin. Note: You will not be able to restore objects after this is done.

Quick Filters allow you to reduce the amount of data displayed in a panel by some criteria that you specify.
- To apply a quick filter in a panel that supports filters, first you will need to click "Show Filters" in the pane above the workspace.

- Add values to the Quick Filter by selecting them in the "Choose Filter" and "Choose Operator" fields.
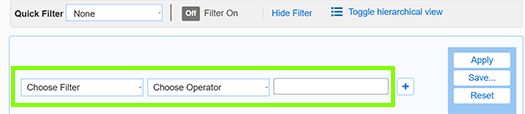
- Click "Apply" to activate the filter.
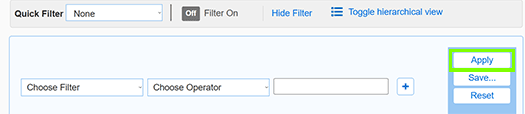
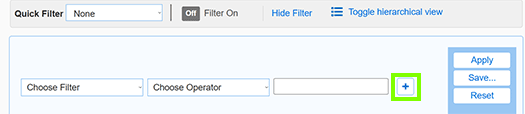
- To add subsequent Quick Filters, click the "+" to the left of the apply button. Please note that the multiple filter lines are added together so the filter will meet the specified criteria.
- To delete a Quick Filter, select the filter you wish to delete from the Quick Filter list. Select the Delete icon next to the filter name.

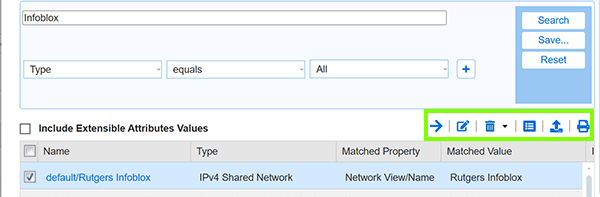
- The global search feature allows you to search the entire Infoblox database as well as filter criteria to refine your search.
- To use the global search function, click the blue global search icon in the upper right hand corner.

- The first drop-down menu, to the right of "Type" and "equals", selects what type of objects to search for, such as search "All networks" or search "All zones".
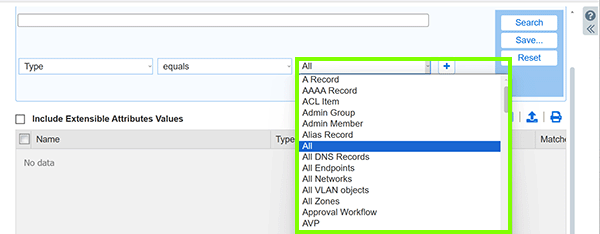
- Type the name of the object you are searching for in the search field at the top.
- Click "Search".
- You can select the desired object from the list of results or click the checkbox next to the object and edit it.
- You can use the Go to function to quickly locate an object, such as a network or a DNS zone.
- With the autocomplete feature, you can type the first few characters of an object name into the "Go to" box at the top of the workspace and select the object from a list of possible matches.

- You can also enter the entire object name, and then click "Go" to locate a specific object.
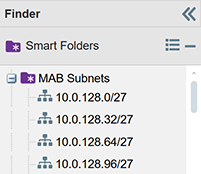 The Smart Folders tab provides a listing of user-defined searches using things like DNS zones, IP networks, host names, or Extensible Attributes. You can use Smart Folders to filter and sort information, and provide customized navigation to an administrative group's resources.
- To view Smart Folders, expand the Finder Panel on the far left-hand side of the main window.
- Click "Smart Folders" to display the smart folders tab.
- Alternately, click "+" to expand the existing smart folders in the panel.
- Click on a smart folder to display it.
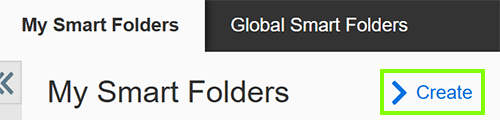
- To create a smart folder, click the green "create button" in the "Smart Folders" tab
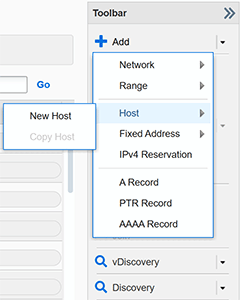 Host records are a data type that create an A and PTR record for a given host name and IP address.
- From the Data Management tab, select the IPAM or DNS tab.
- Navigate to the subnet you wish to add the host record to.
- From the right toolbar, click the "Add" drop-down menu or the "+" button from the top panel toolbar and then choose "Host".
- Click the "Select Zone" button and choose the zone which will contain the FQDN, (for example to create "example.infr.ufl.edu", you would select the zone "infr.ufl.edu").

- Once you have selected the zone, type the FQDN in the "Name" box.
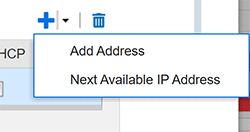 If you already selected an IP address it will be automatically populated. If not, press the "+" button to add an IP address.
- Add a comment in the "Comment" field (optional).
- Click the "Next" button at the bottom of the screen
- If desired, add an Extensible Attribute.
- Click "Save & Close".
- The changes will take effect immediately.
- From the Data Management tab, select the IPAM, DHCP, or DNS tab.
- Search or navigate to the host record you wish to modify.
- Select the checkbox next to the record and click the Edit icon located on the top panel toolbar.
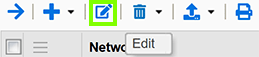
- This will display the "Host Record editor".
- Once you are done making changes to the record, click "Save and close".
- The changes will take effect immediately.
- Navigate to the subnet or DNS zone containing the Host record you wish to delete.
- Select the checkbox next to the host record and click the delete button in the top panel toolbar.

- Click "Yes" when the confirmation dialog appears.
- To enable DHCP for an IP address within a Host record click the "DHCP" checkbox next to the IPv4 address for which you want to enable DHCP.
- Click in the "MAC Address" field (next to the IP address), and enter a MAC address.
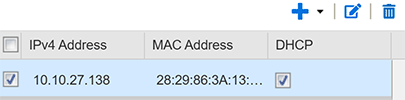
- Click "Save & Close".
- From the Data Management tab, select the DHCP tab.
- Select the subnet in which you wish to define the new DHCP range.
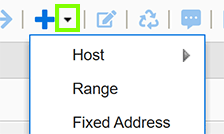 On the toolbar, click the drop-down menu next to the Add ("+") icon.
- Choose "Range".
- This opens the "Add IPv4 Range Wizard".
- With "Add Range" selected, choose next.
- Enter the start and end IP addresses for the range.
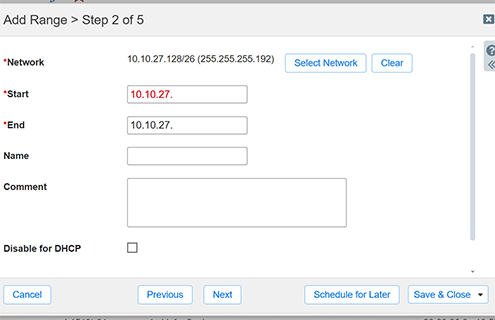
- Click "Next".
- Set the "Served by" option to "IPv4 DHCP Failover Association" and click the "Select Association" button.
- Click "Next".
- The next screen displays the basic DHCP settings and their default values. You may override one of these values if you wish, click the Override button next to that setting and enter a new value.
- Click "Save & Close".
- Click the "restart" button.
- From the Data Management tab, select the DHCP or IPAM tab.
- Select the checkbox next to the address in which you wish to define the fixed address.
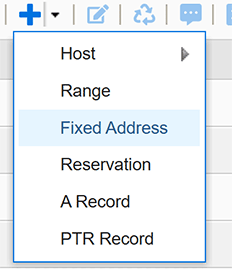
- Click the drop-down menu next to the Add ("+") icon above the table in the main workspace, and choose add a "Fixed Address" -> "IPv4".
- Click "Next".
- Enter the desired IP address, or click "Next Available IP" to have one automatically assigned.
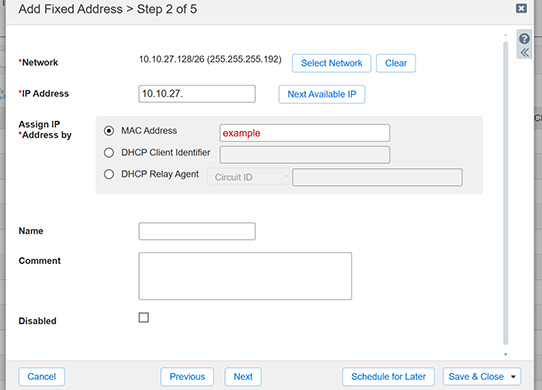
- Next to "Assign IP Address by" ensure that the "MAC address" button is selected, and enter the MAC address.
- Click next.
- Enter any optional extensible attributes.
- "Save & Close".
- Click the "restart button".
If you think you have everything defined, but still are having problems, try some of these to troubleshoot:
-
- From the Data Management tab, select the DHCP or IPAM tab.
- Find the subnet of the device in question, click the pencil (edit) icon next to subnet listing under Network Home link
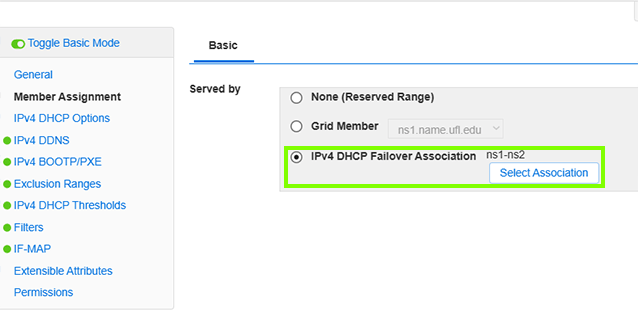
- In the pop-up window, go to Member Assignment tab on the left.
- Make sure ns1.name.ufl.edu (128.227.30.234) and ns2.name.ufl.edu (128.227.30.238) are listed, if not, add them

-
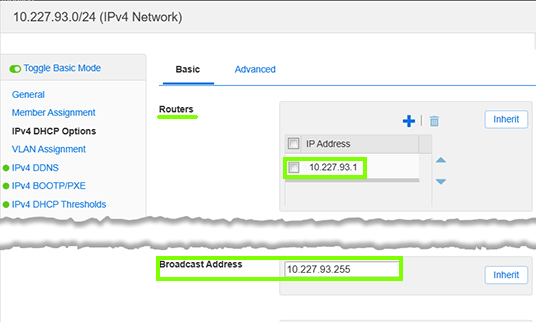
- Next, click on IPv4 DHCP Options tab
- Make sure the Router IP address (gateway) and the Broadcast address are correctly listed given your network.
-
- Note: Certain subnets: MFD, VOIP and LWAPP - may need custom DHCP options; please, contact IRS for more information
-
- If a DHCP range is defined, from the Data Management tab, select the DHCP tab.
- Click the box next to the range, then click edit icon.
- In the pop-up window, click Member Assignment menu tab on the left. Make sure that IPv4 DHCP Failover Association radio button is selected and ns1-ns2 are listed.
-
- If you are still having issues after configuring DHCP, please, contact Infrastructure Reliability Service
- If at any time you made a change in this section you will need to click the "Restart" button in the upper left corner of the browser window. Please, see "When will my DDI changes take effect?" for detailed instructions.
- From the Data Management tab, select the DNS tab.
- Search or navigate to the the zone you wish to add the CNAME record to.
- In the toolbar, click "Add" and then choose "Record" and then "CNAME" from the drop-down menus.

- The "Add CNAME Record" box appears.
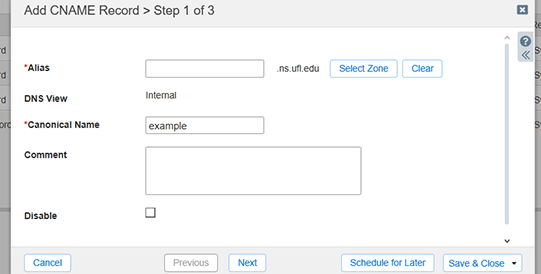
- Enter a name for your CNAME in the "Alias" box.
- Enter the canonical name of the record you wish to point to in the "Canonical Name" box
- Enter an optional comment.
- If desired, add an extensible attribute.
- Click "Save and Close".
- The changes will take effect immediately.
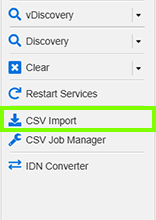
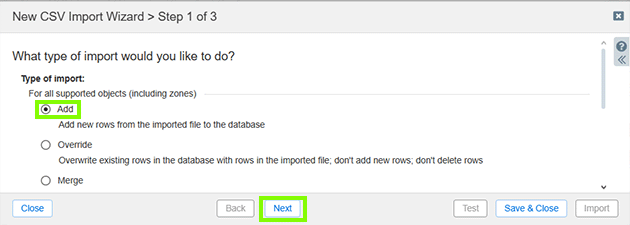
- Click "CSV Import" on the Toolbar panel to bring up "New CSV Import Wizard".
- Select "Add" and click "Next".
- Click "Choose" button and find a CSV file to upload. The file path should appear in the text box.
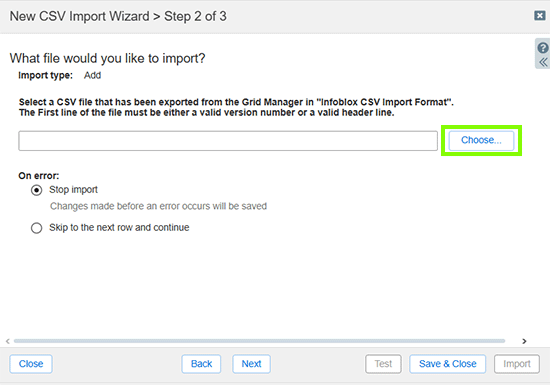
- Click "Next".
- Preview of your data will appear.
- Click "Import"
- Once the import operation has completed, check the "Rows with Errors" counter to see if there were any errors. If so, click the "Download Errors" button to retrieve another CSV containing the error rows and error messages.
- Once you have addressed the errors, run the CSV import again
- Once the import is successful, click "Save and close".
- The records will appear in the workspace immediately.
- Most changes take place immediately. Other changes will need a Restart of the service. DHCP service restarts are scheduled every 2 hours starting at 7:00 am for Wired DHCP and 7:30 am for Wireless DHCP. DNS service restart is scheduled on Sunday at 10 pm.
- If you need a restart out of a regular schedule, contact IRS to restart it for you.