The Cisco Secure VPN client is the preferred Gatorlink VPN client. It is available for the following systems:
- Windows
- MacOSX
- Ubuntu Linux
- Fedora Linux
- Apple iOS (iPhone, iPad, iTouch)
- Android OS (See guide for specific versions)
Other operating systems may work, but official support is limited to the platforms listed above. Information about specific version support is available from the VPN Client Download Page
- Windows Cisco Secure VPN Client Installation
Windows Cisco Secure VPN Client Installation
- Browse to VPN Client Download Page
- Start the "anyconnect-win" installer downloaded in step 2.
- At each prompt, click "Next." You may see a "User Account Control" dialog box asking if you would like to install the program. Click "Yes."
- Once the install is complete, click "Finish."
- Start the "anyconnect-win-gina" installer downloaded in step 2.
- At each prompt, click "Next." You may see a "User Account Control" dialog box asking if you would like to install the program. Click "Yes."
- Once the install is complete, click "Finish."
- The machine will now ask to reboot. Click yes to reboot.
- Launch the client by going to Start->All Programs->Cisco->Cisco Secure VPN Secure Mobility Client
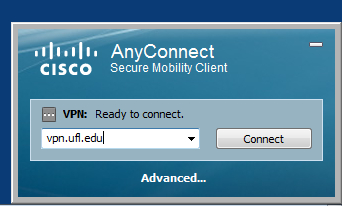
- In the field to the left of the "Connect" button, click on the text area and type "vpn.ufl.edu". Click connect.
- Authenticate with your gatorlink ID (in the form of username@ufl.edu) and your gatorlink password. Click OK.
- The most recent version of the client and vpn configuration files will be automatically downloaded. This may require another reboot to complete the update.
- Your client is now ready for use.
Notes:
- Once the Cisco Secure VPN is installed on your machine, it will always be automatically upgraded to the latest version as they are published by Network Services. You shouldn't need to go through the manual installation process unless you reinstall your operating system, or your client becomes corrupted and needs to be uninstalled and reinstalled.
- After connecting for the first time, the VPN policy will be pushed to your client. The pulldown will say "Gatorlink VPN" rather than vpn.ufl.edu after this policy is downloaded.
- MacOSX Cisco Secure VPN Client Installation
- Browse to VPN Client Download Page
- Download the anyconnect-macosx file. These should be saved to a directory on your computer.
- Launch the "dmg" file. A new window will pop up on your desktop.
- Double-click on the Cisco Secure VPN package in the new window.
- You may get an alert that the software cannot be installed because it is from an unidentified developer. You may need to go to Apple->System Preferences->Security and Privacy->Geineral, and change the setting to allow apps from anywhere to be run. This can be changed back to its previous setting once the installation is complete.
- Select an appropriate destination for the installed files.
- Click "Continue" through the installer, accepting the remaining default configuration.
- If this is the first time you are installing a 5.x or above VPN client on this system, you may get an "Action Required" pop up window. Please click on the "Open System Settings" button and follow the instructions on the window to enable the Cisco Secure VPN Service. The window will disapear once the required action is taken. You will only have to do this once.
- Click "Install". This will require you authenticate to your computer using your local account, not your gatorlink account.
- The Cisco Secure VPN client is now installed on your system.
- Launch the client by going to Macintosh HD->Applications->Cisco and double-click on Cisco Secure VPN Secure Mobility Client.
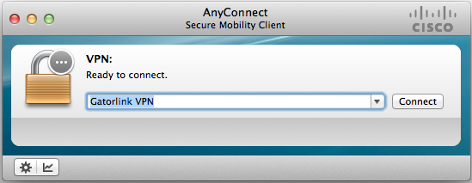
- In the "Connect To" Field, type "vpn.ufl.edu". Click "Select" to connect.
- Authenticate with your gatorlink ID (in the form of username@ufl.edu) and your gatorlink password. Click OK.
- The most recent version of the client and vpn configuration files will be automatically downloaded.
- Your client is now ready for use.
Notes:
- Once the Cisco Secure VPN is installed on your machine, it will always be automatically upgraded to the latest version as they are published by Network Services. You shouldn't need to go through the manual installation process unless you reinstall your operating system, or your client becomes corrupted and needs to be uninstalled and reinstalled.
- After connecting for the first time, the VPN policy will be pushed to your client. The pulldown will say "Gatorlink VPN" rather than vpn.ufl.edu after this policy is downloaded.
- Linux (Ubuntu) Cisco Secure VPN Installation Guide
- Browse to VPN Client Download Page
- Download the correct "anyconnect-predeploy-linux" file (32 or 64 bit). This file should be saved to a directory on your computer.
- Open a terminal window by going to the Dash Home icon in the upper left hand corner of the screen and typing terminal into the text box at the top. Click on the resulting icon.
- CD to the directory you downloaded the file to.
- Type tar -xvzf anyconnect-predeploy-linux-[version]-k9.tar.gz
- where [version] is the version of the client you downloaded.
- Type cd anyconnect-[version]/vpn
- Type sudo ./vpn_install.sh
- You may be asked for a password. Use your local user password.
- Type "Y" to agree to the license agreement.
- For Ubuntu 18.04, you must install the pangox libraries for the GUI to work. From the command line type "sudo apt install libpangox-1.0.0" after the client installation is complete.
- Type cd ../dart/
- Type sudo ./dart_install.sh
- Type "Y" to agree to the license agreement.
- Click the "Dash Home" icon on the upper left hand corner of the screen.
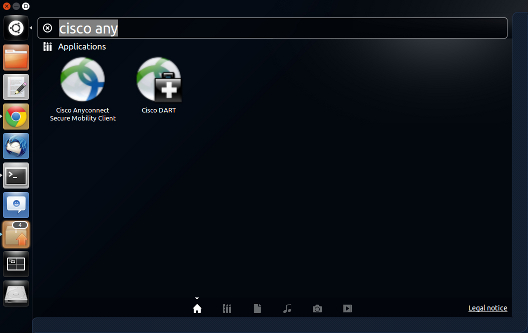
- Type "Cisco Any" into the dash text area. You will see "Cisco Secure VPN Secure Mobility Client" appear. Click on it.
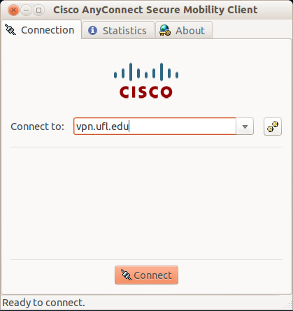
- Just to the right of "Connect To", type "vpn.ufl.edu" and click "Connect."
- Authenticate with your gatorlink ID (in the form of username@ufl.edu) and your gatorlink password. Click OK.
- The most recent version of the client and vpn configuration files will be automatically downloaded.
- Your client is now ready for use.
Notes:
- Once the Cisco Secure VPN is installed on your machine, it will always be automatically upgraded to the latest version as they are published by Network Services. You shouldn't need to go through the manual installation process unless you reinstall your operating system, or your client becomes corrupted and needs to be uninstalled and reinstalled.
- After connecting for the first time, the VPN policy will be pushed to your client. The pulldown will say "Gatorlink VPN" rather than vpn.ufl.edu after this policy is downloaded.
- You may make the Cisco Secure VPN icon appear on the Unity icon launcher by right clicking on the icon just after launching the Cisco Secure VPN client and selecting "Lock to Launcher."
- Linux (Fedora) Cisco Secure VPN Installation Guide
- Browse to VPN Client Download Page
- Download the correct "anyconnect-predeploy-linux" file (32 or 64 bit). This should be saved to a directory on your computer.
- Open a terminal window by going to Activities Tab->Show Applications->Terminal
- Type su - rootand enter the root password.
- CD to the directory you downloaded the file to.
- Type tar -xvzf anyconnect-predeploy-linux-[version]-k9.tar.gz
where [version] is the version of the client you downloaded. - Type cd anyconnect-[version]/vpn
- Type ./vpn_install
- Type "Y" to agree to the license agreement.
- Type cd ../dart/
- Type ./dart_install.sh
- Type "Y" to agree to the license agreement.
- Type yum install pangox-compat
- Click on the "Activities" tab on the upper left hand corner of the screen.
- The Cisco Secure VPN client will be located under the "Show Applications" icon at the bottom. Click on it.
- Just to the right of "Connect To", type "vpn.ufl.edu" and click "Connect."
- Authenticate with your gatorlink ID (in the form of username@ufl.edu) and your gatorlink password. Click OK.
- The most recent version of the client and vpn configuration files will be automatically downloaded.
- Your client is now ready for use.
Notes:
- Once the Cisco Secure VPN is installed on your machine, it will always be automatically upgraded to the latest version as they are published by Network Services. You shouldn't need to go through the manual installation process unless you reinstall your operating system, or your client becomes corrupted and needs to be uninstalled and reinstalled.
- After connecting for the first time, the VPN policy will be pushed to your client. The pulldown will say "Gatorlink VPN" rather than vpn.ufl.edu after this policy is downloaded.
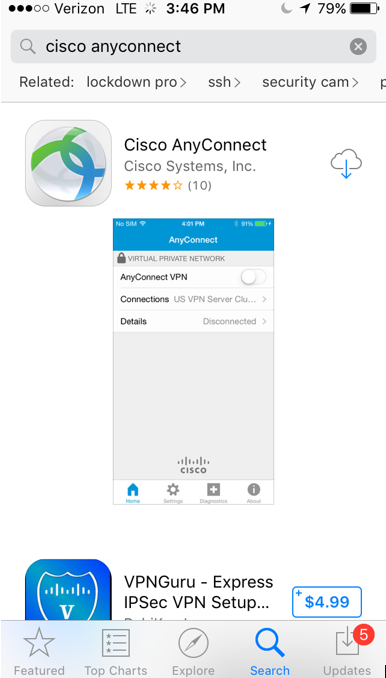
- iPhone Cisco Secure VPN Installation/Configuration Guide
- Download the Cisco Secure VPN app from the App Store, and launch it from the home screen.
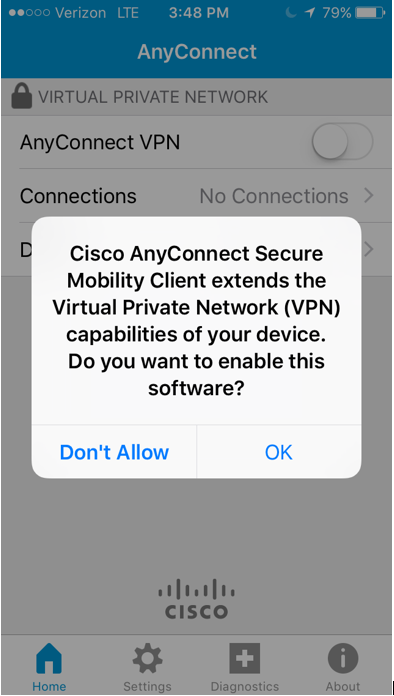
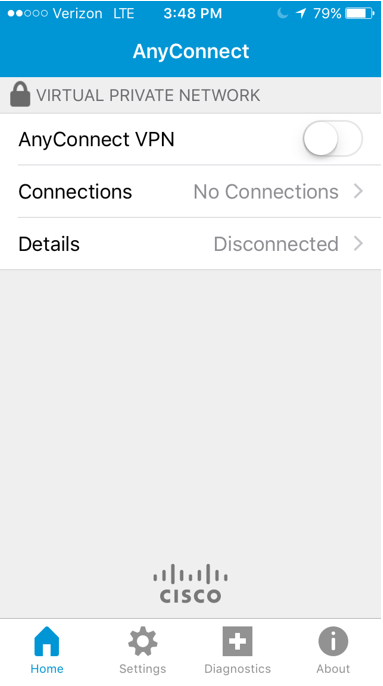
- When launched, the client will ask if it's okay to extend the device's VPN capabilities. Click "OK" then click "Add VPN Connection..."
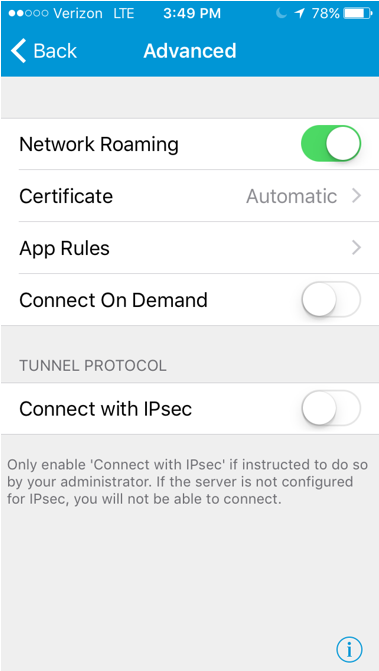
- The following screen will load. Match the information with that found in the following screenshot:
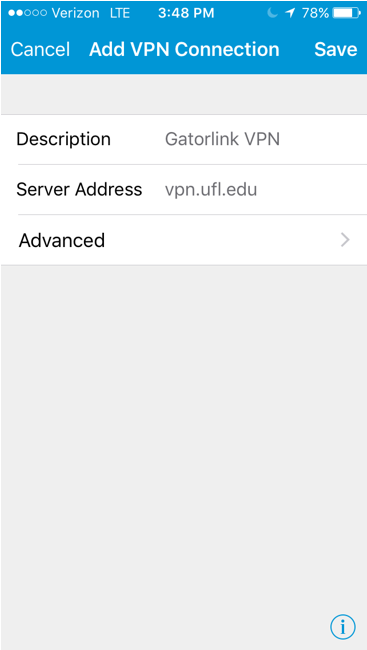
- Once you click "Save", it will take you to the home screen. Select the Gatorlink VPN (so it is "checked".
- Slide the "Any Connect VPN" to the ON position. Once you do this, it will bring you to an authentication screen. Enter your Gatorlink username and password
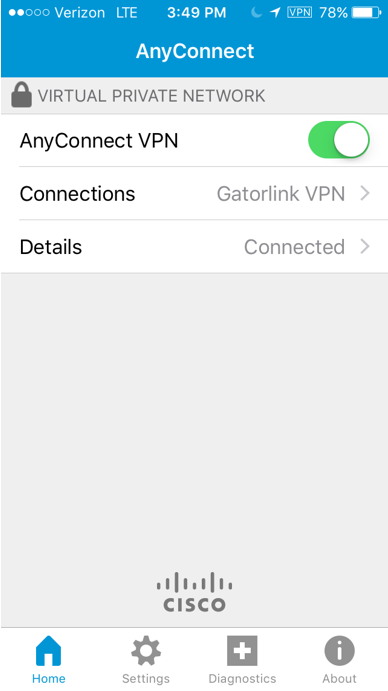
- Click "Connect" - it will bring you to the home screen once again. You should now be connected to the VPN (notice the VPN icon in the upper right, by the battery).
Notes:
- It seems that at this point on some devices, the Gatorlink VPN will automatically be imported by Cisco Secure VPN. You can rename the VPN set up by you to "Gatorlink VPN (user)." You can use either of these to connect to the VPN, but you don't need both of them.
- If this happens, delete the "Gatorlink VPN (user)" entry (you will just need to reenteryour password to connect to the VPN a second time).
- Download the Cisco Secure VPN app from the App Store, and launch it from the home screen.
- Android Cisco Secure VPN Installation/Configuration Guide
Note: Because of the varying settings across Android operating systems, not all devices will work with the Cisco Secure VPN app.
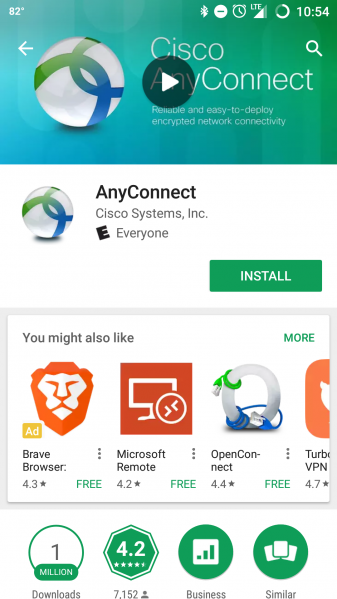
- Download Cisco Secure VPN Application from Google Play Store.
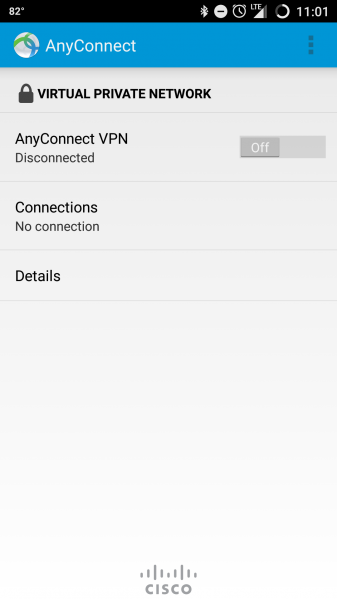
- Open the Cisco Secure VPN Client. It should look like this:

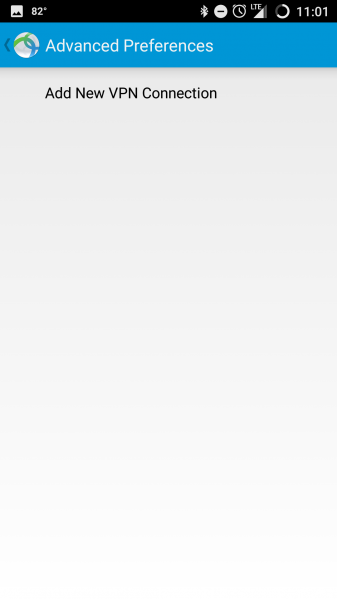
- The following screen should appear. Click on "Connections".
- Click "Add New VPN Connection." If this is the first time you are accessing the application, you will see an End User Agreement.
- Give the connection a description and set the server address as vpn.ufl.edu.
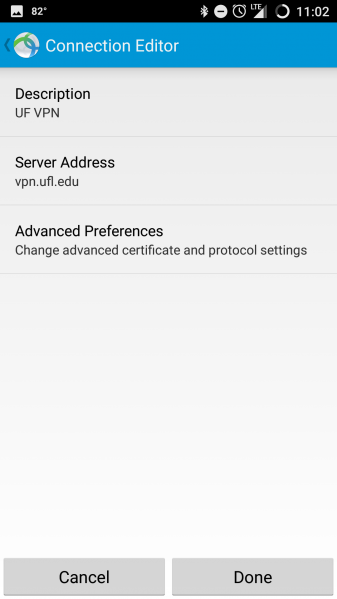
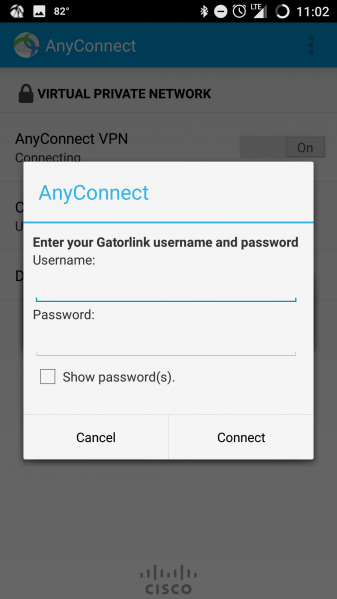
- After pressing "Done", you will be prompted to enter your GatorLink username and password
- You may get a prompt stating "Connection Request". Hit "OK" and the key icon will then appear in the top of the screen.
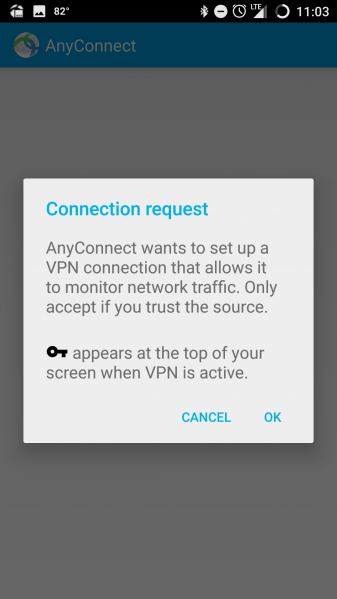
- You should now be connected to the VPN.
Notes:
- You may be prompted to accept that this application will send all traffic over the VPN, if you are, go ahead and accept it.
- At this point on some devices, the Gatorlink VPN will automatically be imported by Cisco Secure VPN. You can rename the VPN set up by you to "Gatorlink VPN (user)." You can use either of these to connect to the VPN, but you don't need both of them. If this happens, delete the "Gatorlink VPN (user)" entry (you will just need to reenter your password to connect to the VPN a second time).
- Download Cisco Secure VPN Application from Google Play Store.